Outlook 2016 (Windows) is one of the latest versions of Microsoft Outlook—an email client and a personal information manager.
Let’s get to it.
Step 1: Open Outlook
Open the Outlook 2016 app on your Windows computer from the startup menu.
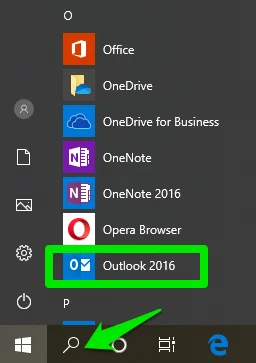
You could use the search bar to find the app quickly. Click File on the menu bar, then Add Account under Account Information.

Choose your account setup method.
Select Manual setup or additional server types and click Next for a manual account setup.

Step 2:
-
IMAP doesn’t delete the server copies, making it easier for you to access the email from any device.
So, under Choose Service, select POP or IMAP and click Next.

Step 3: Configure Your Account Settings
Select the incoming email protocol to use from the Account Type drop-down menu.
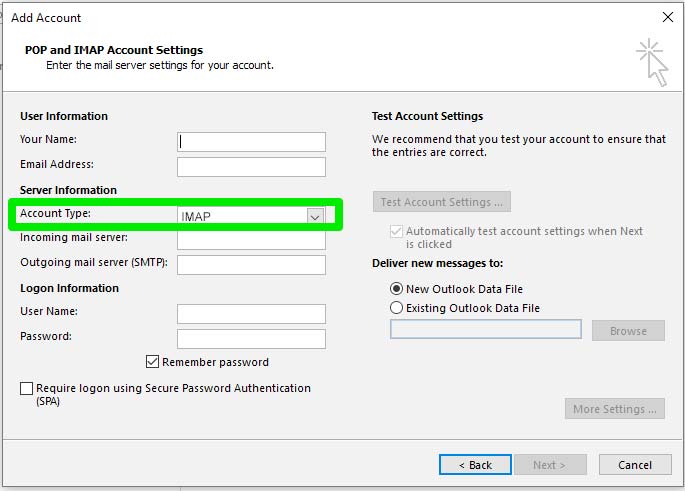
Use mail.lifestyleir.com as your incoming mail server and outgoing mail server (SMTP) addresses.

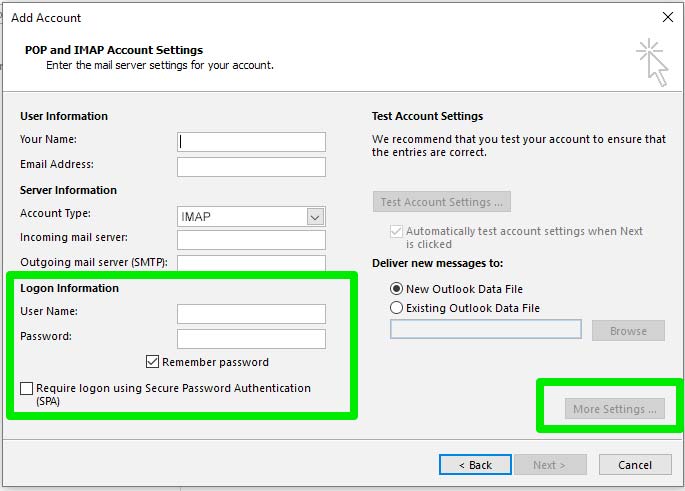
In the User Name text box, type your email address and enter the email password.
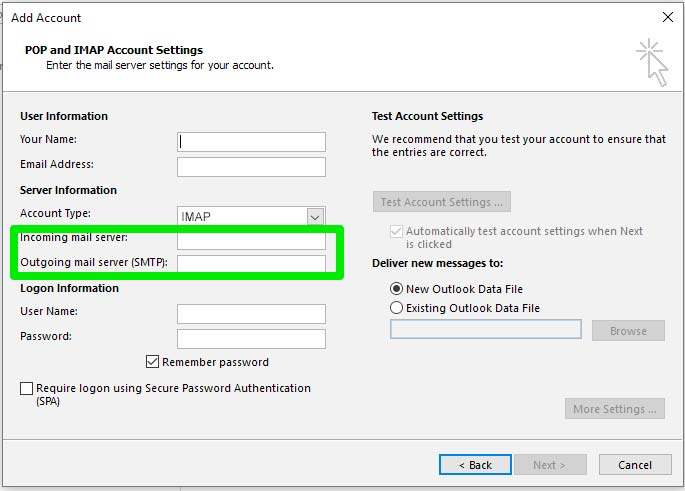
Select Require logon using Secure Password Authentication (SPA) to log into your account via password authentication.
Click More Settings to continue.
Step 4: Configure Internet E-mail Settings
On the next prompt, click the Outgoing Server tab.

Select My outgoing server (SMTP) requires authentication and use the same settings for your incoming server.
Click the Advanced tab to enter your incoming and outgoing servers’ port numbers and set up encryption.
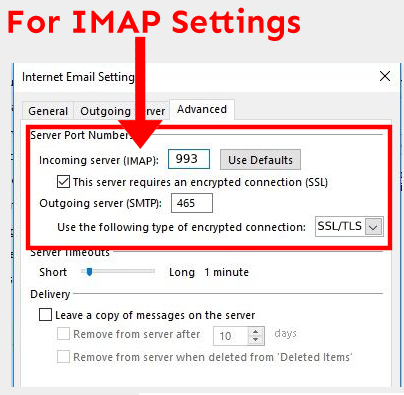

Click on “Leave a copy of messages on the server”.
Click OK to save the changes, then Next > Finish to complete the setup and exit the window.
Log into your Gmail account
The settings for adding more email addresses to your account are only available in Gmail’s browser interface, so you’ll need a desktop or a laptop computer to complete the process.
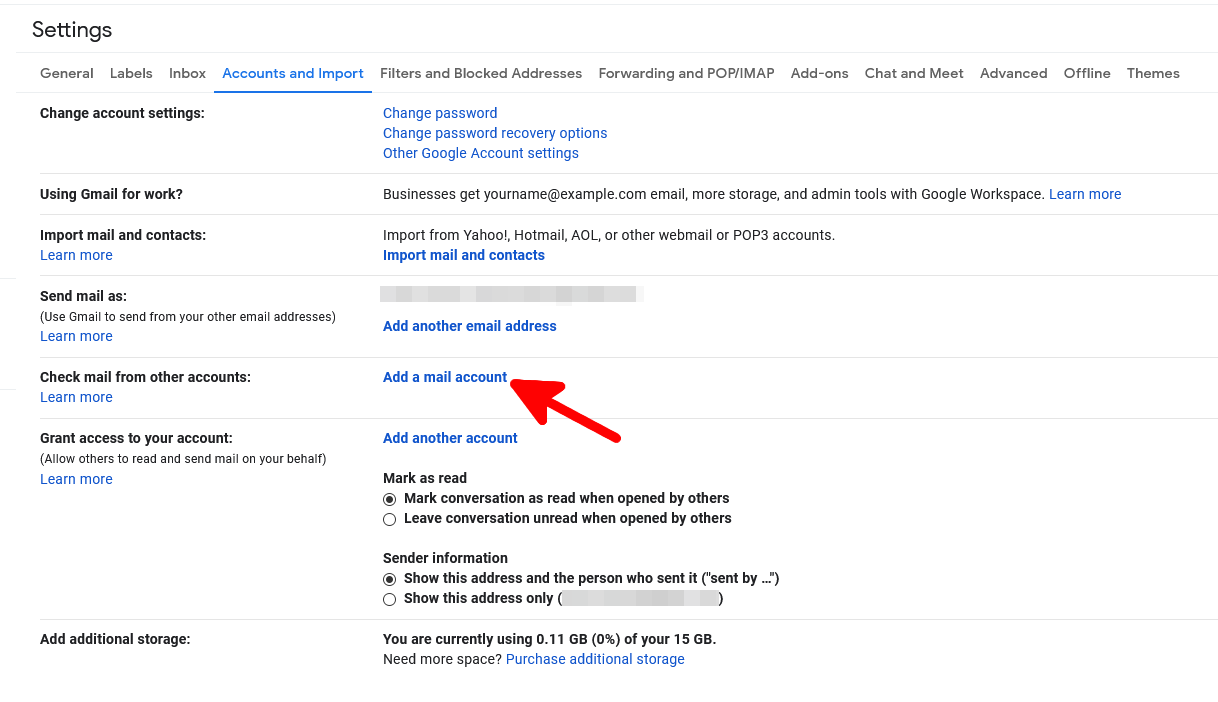
Go to Settings > Accounts and Import > Add a mail account
Click the Gear icon in the top-right corner, select See all settings, and open the Accounts and Import tab. Under the Check mail from other accounts section, click Add a mail account.
Enter your custom email address
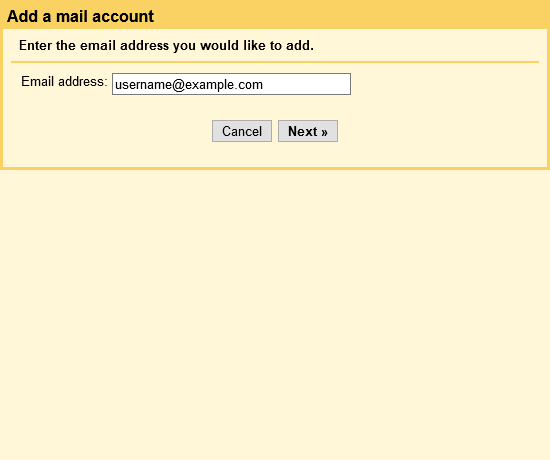
Enter your custom email address in the pop-up that appears and click Next.
Select Import emails from my other account (POP3) and click Next.
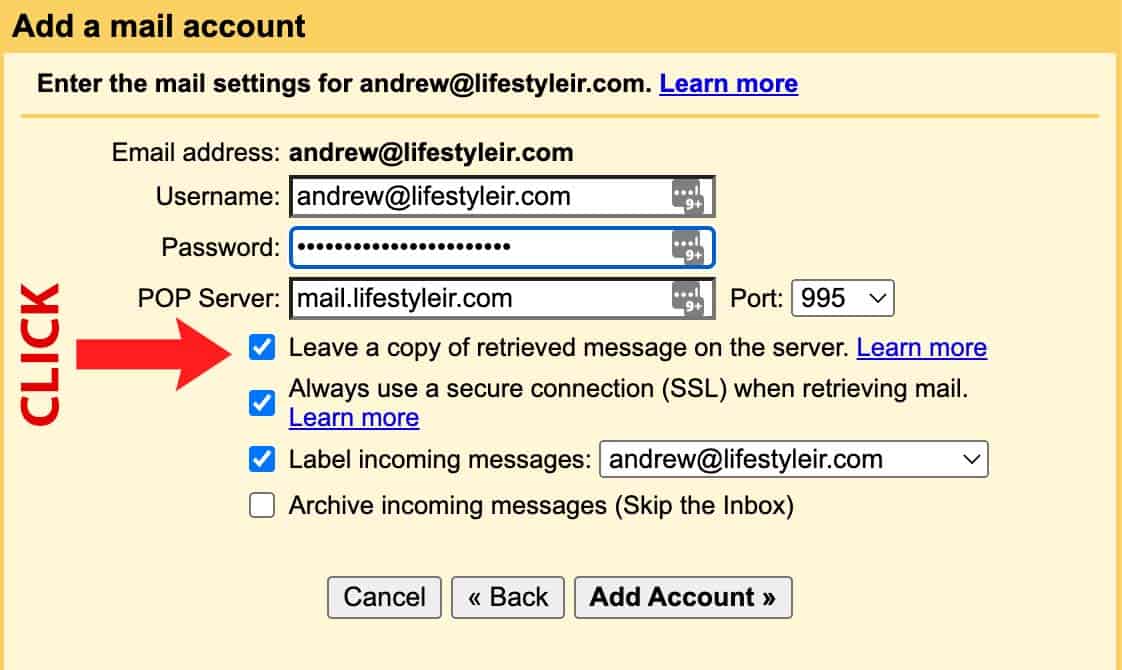
Enter your custom email address login credentials
– POP SERVER: mail.lifestyleir.co
– Port 995
Configure Sending
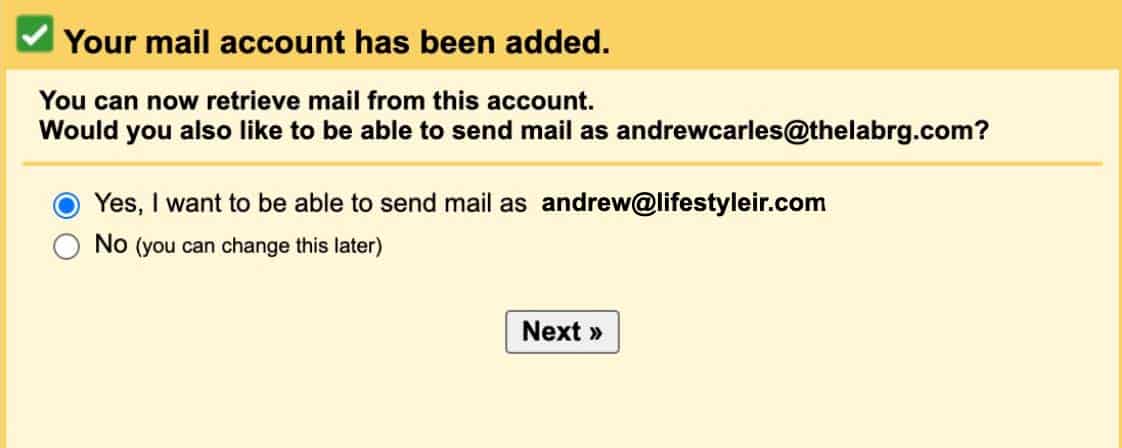
The following Screen will ask if you would like to send from your @lifestyleir.com email.
Select Yes, then click Next.
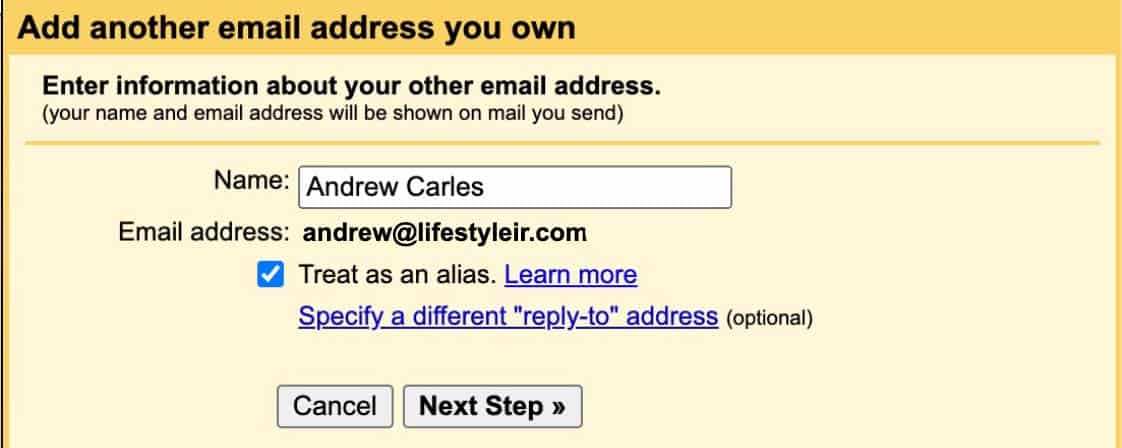
Gmail asks you to enter the display name that will appear on messages sent from your custom email address.
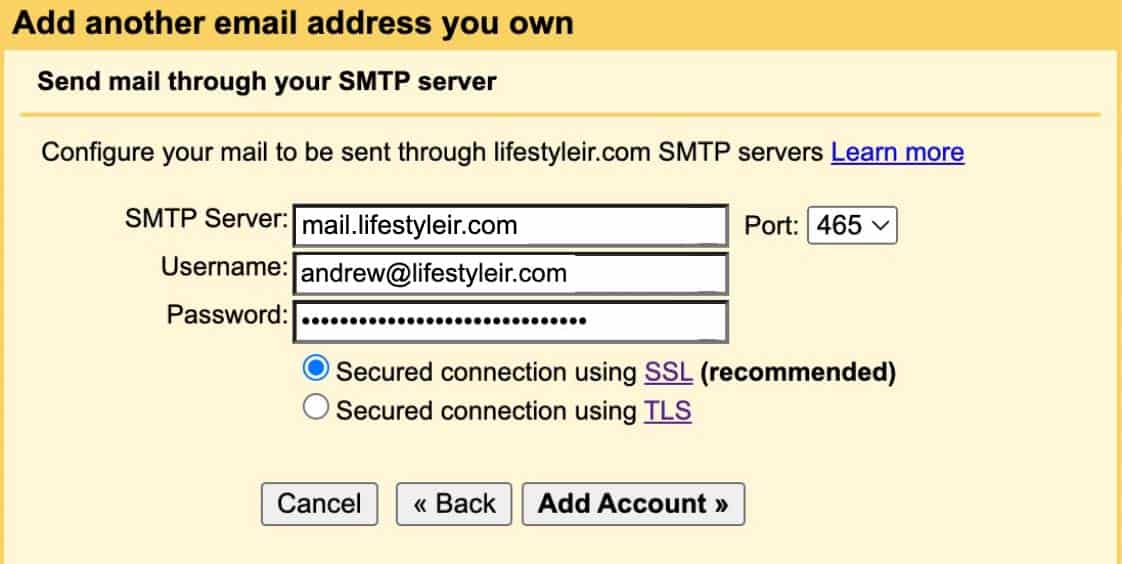
On the next screen, you first have to tell Gmail which SMTP server to use. Be sure to select port 465 and the Secured connection using SSL radio button. Finally, enter the login credentials for your custom email address and click Add Account.
– SMTP SERVER: mail.lifestyleir.com
– Port 993
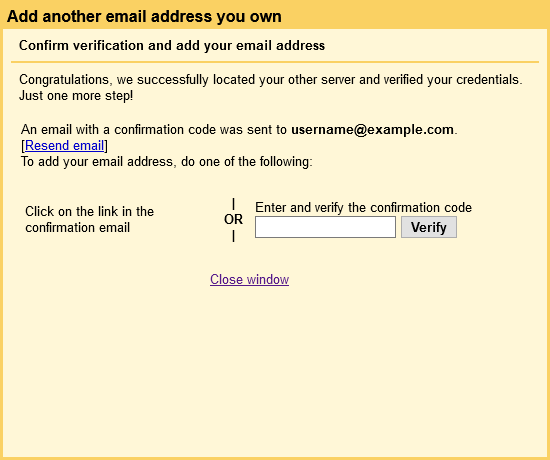
Verify your custom email address
The final step is to verify that you have access to your custom address. Gmail will send you a verification email to your lifestyleir.com email which has a confirmation code and a link. Click the link or paste the code to verify your email.
